> ## Documentation Index
> Fetch the complete documentation index at: https://docs.codemod.com/llms.txt
> Use this file to discover all available pages before exploring further.
# Jira Integration
export const NeedHelpFooter = ({provider, troubleshootingText = "troubleshooting steps"}) => {
return
Need help? If you encounter any issues setting up the {provider} integration, please contact our support team or visit our documentation for {troubleshootingText}.
;
};
export const ManagingIntegration = ({provider, settingsPath = "Settings → Integrations", actionText = "Configure or Disconnect"}) => {
return <>
Managing the Integration
To disconnect or modify the {provider} integration:
- Go to Codemod {settingsPath}
- Find your {provider} integration and click {actionText}
;
};
Connect Codemod to your Jira workspace to sync issues with your projects and automatically track progress of your code transformation campaigns.
## Why Integrate Jira?
Integrating Codemod with Jira allows you to:
* Link code transformation projects to Jira epics for tracking
* Automatically sync task progress between Codemod and Jira
* Trigger codemods based on Jira issue updates
## Setting Up the Integration
### Step 1: Navigate to Organization Settings
Sign in to [Codemod](https://app.codemod.com) and navigate to your organization settings:
1. Select your organization from the team switcher
2. Go to **Settings** from the organization menu
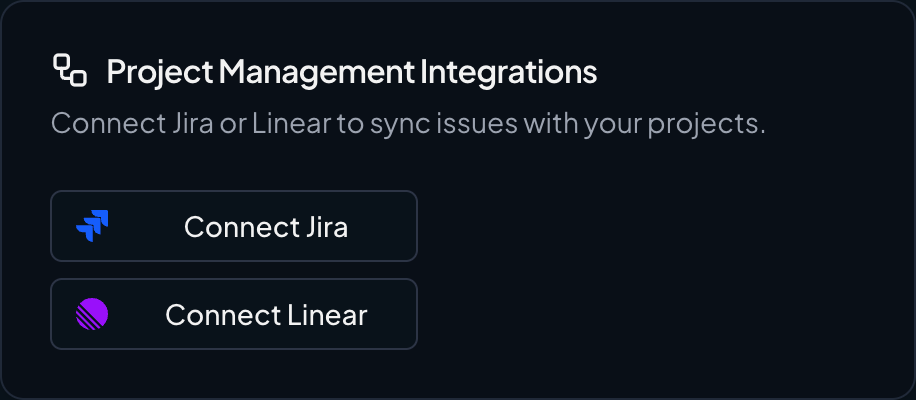
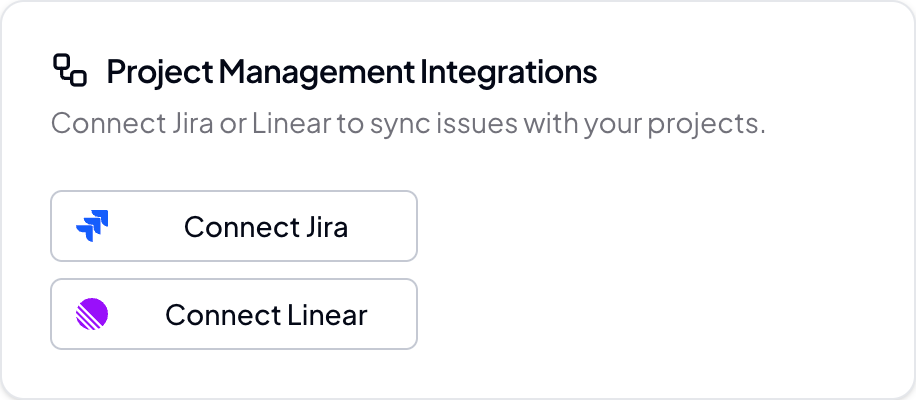
3. Scroll down to the **Project Management Integrations** section
### Step 2: Connect Jira
Click the **"Connect Jira"** button to begin the integration process.
 ### Step 3: Create a Jira API Token
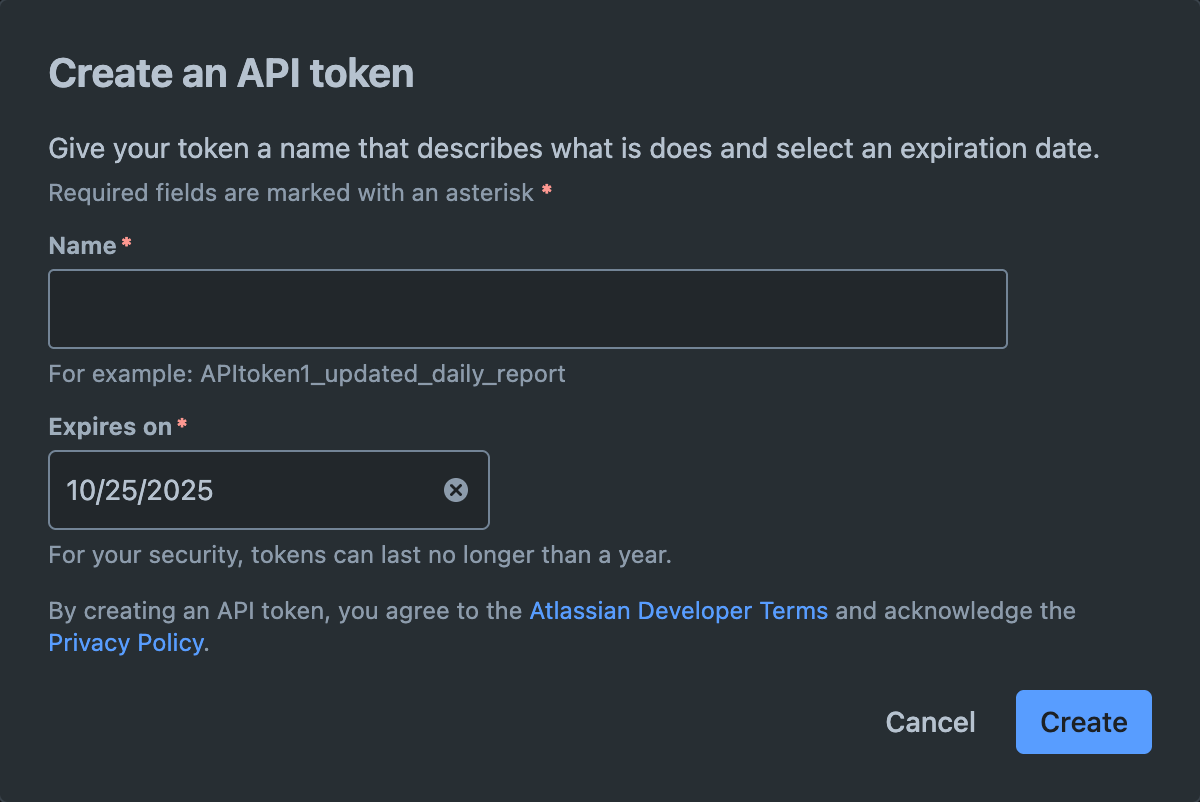
Before proceeding, you'll need to create an Atlassian API token:
Go to [Atlassian API Tokens](https://id.atlassian.com/manage-profile/security/api-tokens) and sign in to your account.
1. Click **"Create API token"**
2. Enter a label (e.g., "Codemod Integration")
3. Click **"Create"**
4. Copy the generated token immediately
Make sure to copy the token right away. Atlassian will only show it once for security reasons.
### Step 3: Create a Jira API Token
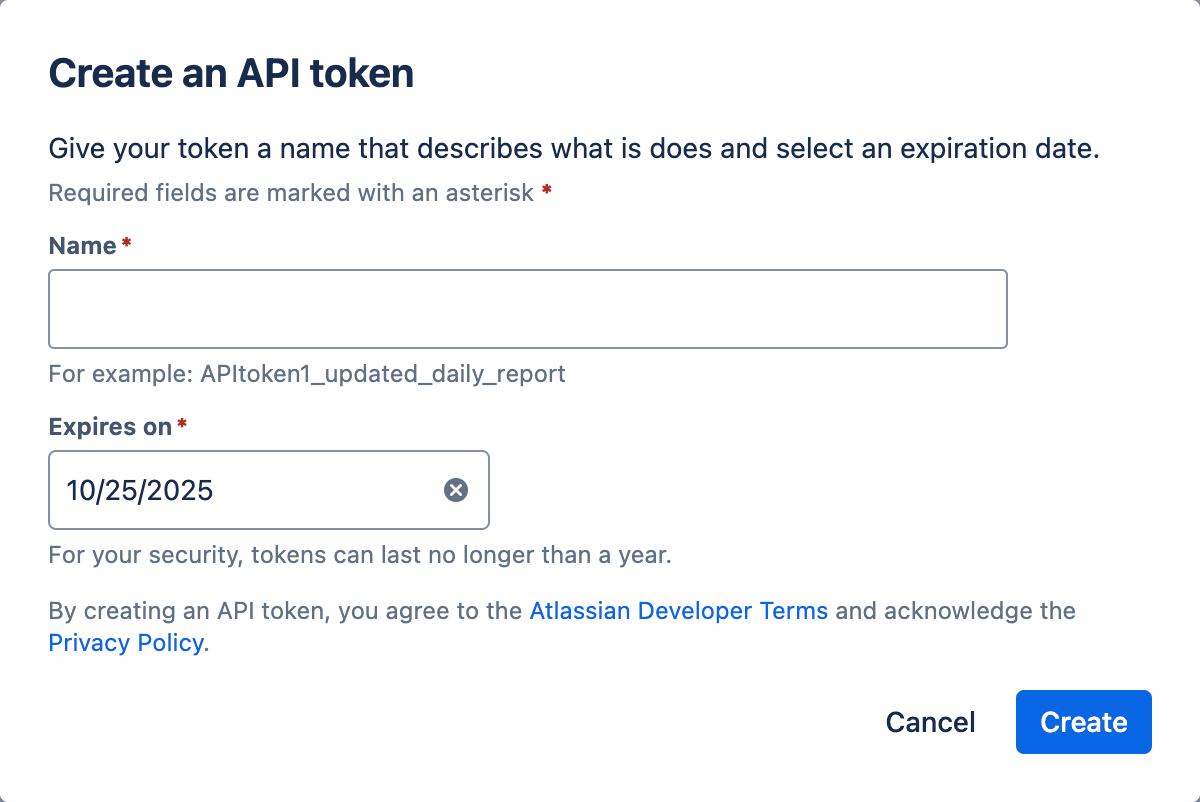
Before proceeding, you'll need to create an Atlassian API token:
Go to [Atlassian API Tokens](https://id.atlassian.com/manage-profile/security/api-tokens) and sign in to your account.
1. Click **"Create API token"**
2. Enter a label (e.g., "Codemod Integration")
3. Click **"Create"**
4. Copy the generated token immediately
Make sure to copy the token right away. Atlassian will only show it once for security reasons.
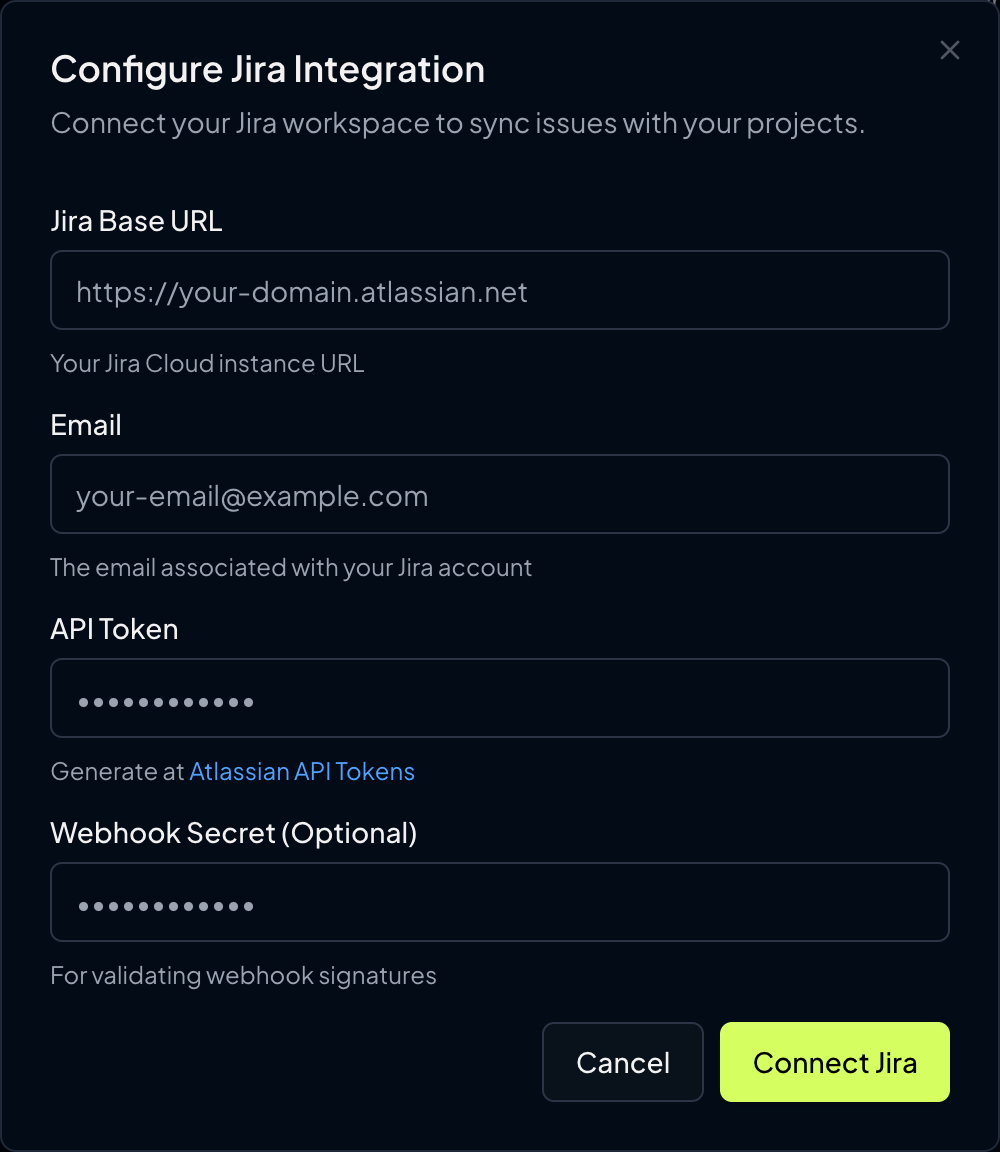
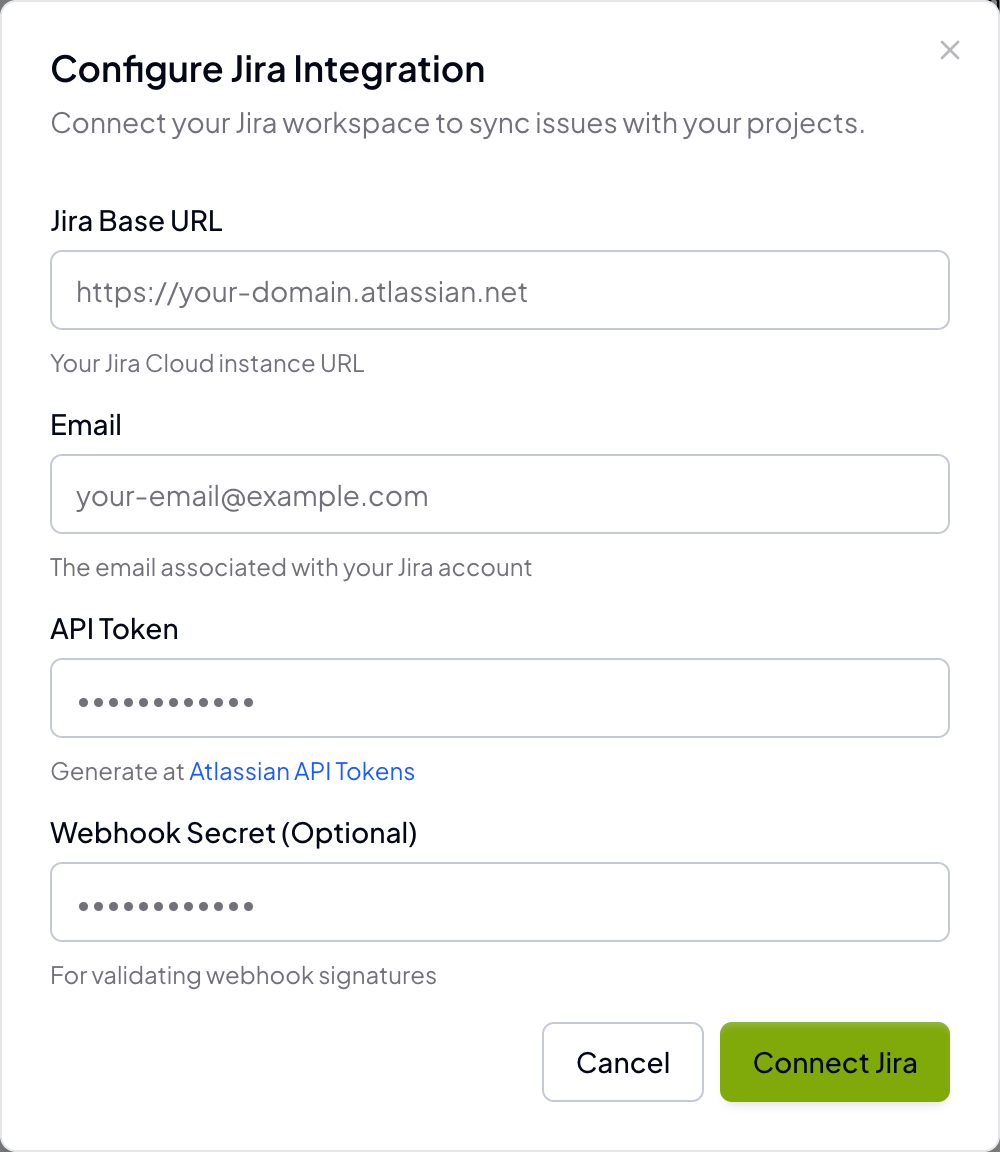
 ### Step 4: Configure Jira Integration
Fill in the Jira integration form with your workspace details:
Your Jira Cloud instance URL (e.g., `https://your-domain.atlassian.net`)
The email address associated with your Jira account
The API token you created in the previous step
Optional webhook secret for validating webhook signatures (recommended for security)
### Step 4: Configure Jira Integration
Fill in the Jira integration form with your workspace details:
Your Jira Cloud instance URL (e.g., `https://your-domain.atlassian.net`)
The email address associated with your Jira account
The API token you created in the previous step
Optional webhook secret for validating webhook signatures (recommended for security)
 Click **"Connect Jira"** to complete the initial setup.
## Webhook Configuration (Recommended)
Webhooks allow Codemod to receive real-time updates when Jira issues change. This is optional but recommended for the best experience.
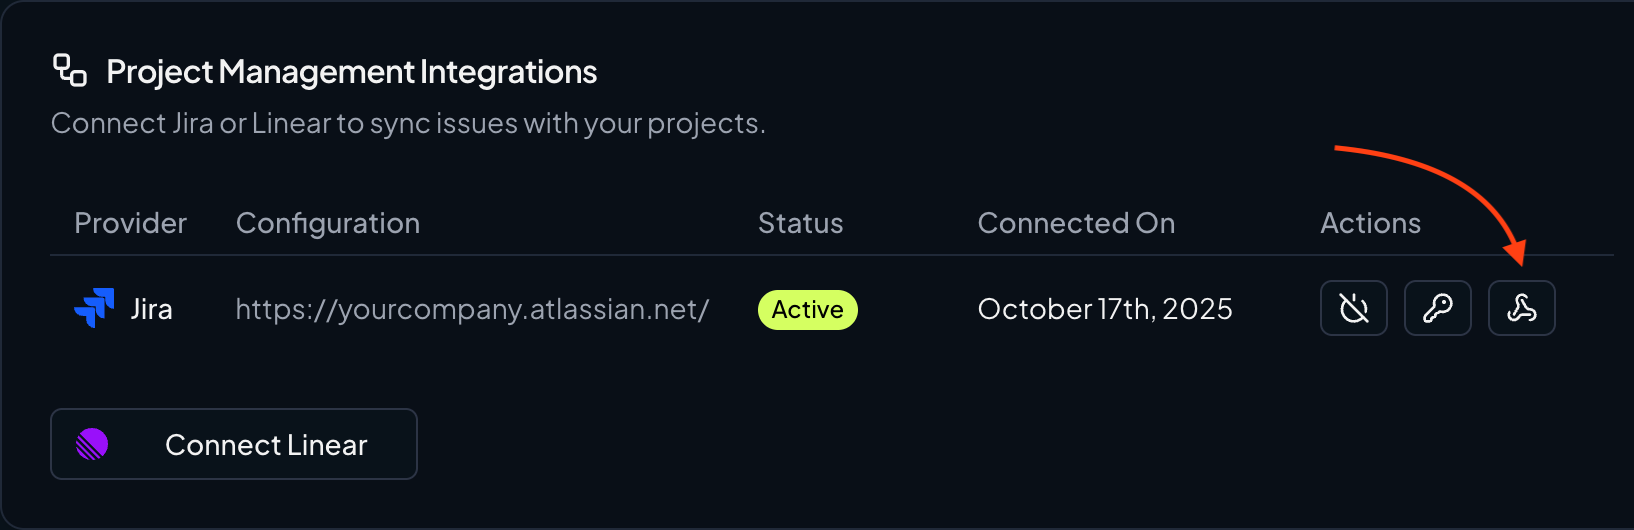
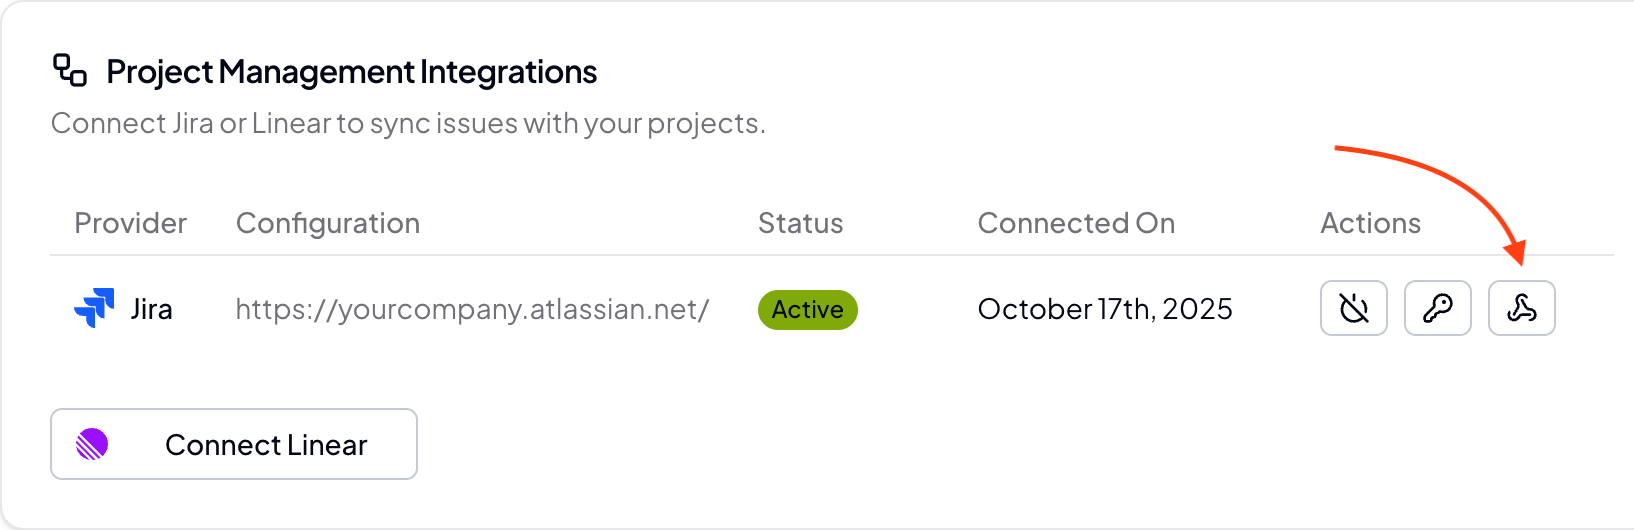
### Step 1: Access Webhook Settings
After connecting Jira, you'll see webhook configuration options in your organization settings:
1. Find your connected Jira integration in the settings
2. Click the **webhook icon** to configure webhooks
Click **"Connect Jira"** to complete the initial setup.
## Webhook Configuration (Recommended)
Webhooks allow Codemod to receive real-time updates when Jira issues change. This is optional but recommended for the best experience.
### Step 1: Access Webhook Settings
After connecting Jira, you'll see webhook configuration options in your organization settings:
1. Find your connected Jira integration in the settings
2. Click the **webhook icon** to configure webhooks
 ### Step 2: Configure Webhook in Jira
Copy the webhook URL provided in the Codemod webhook configuration modal.
Go to your Jira workspace at `https://your-domain.atlassian.net/plugins/servlet/webhooks`
Or navigate manually:
1. Go to **Jira Settings** (⚙️ icon)
2. Select **System** → **Webhooks**
3. Click **"Create a webhook"**
Fill in the webhook details:
* **Name**: `Codemod Integration`
* **Status**: `Enabled`
* **URL**: Paste the webhook URL from Codemod
* **Issue related events**: Check all issue events (created, updated, deleted)
Generate a webhook secret and copy it. This will be used to validate the webhook signature.
### Step 3: Save Webhook Configuration
Back in Codemod, enter your webhook secret and save the configuration.
## Managing Your Jira Integration
### Updating Credentials
To update your Jira API token or email:
1. Go to **Organization Settings** → **Project Management Integrations**
2. Find your Jira integration and click the **credentials icon** (🔑)
3. Enter your updated email and API token
4. Click **"Update Credentials"**
### Updating Webhook Settings
To modify webhook configuration:
1. Go to **Organization Settings** → **Project Management Integrations**
2. Find your Jira integration and click the **webhook icon**
3. Update your webhook secret
4. Click **"Save Webhook Configuration"**
## Linking Projects to Jira Epics
Once Jira is integrated, you can link individual Codemod projects (campaigns) to Jira epics for tracking.
### From a Project Page
Open any Codemod project/campaign from your dashboard.
In the project header area, you'll see a **"Link to a Jira Epic"** button with the Jira logo.
### Step 2: Configure Webhook in Jira
Copy the webhook URL provided in the Codemod webhook configuration modal.
Go to your Jira workspace at `https://your-domain.atlassian.net/plugins/servlet/webhooks`
Or navigate manually:
1. Go to **Jira Settings** (⚙️ icon)
2. Select **System** → **Webhooks**
3. Click **"Create a webhook"**
Fill in the webhook details:
* **Name**: `Codemod Integration`
* **Status**: `Enabled`
* **URL**: Paste the webhook URL from Codemod
* **Issue related events**: Check all issue events (created, updated, deleted)
Generate a webhook secret and copy it. This will be used to validate the webhook signature.
### Step 3: Save Webhook Configuration
Back in Codemod, enter your webhook secret and save the configuration.
## Managing Your Jira Integration
### Updating Credentials
To update your Jira API token or email:
1. Go to **Organization Settings** → **Project Management Integrations**
2. Find your Jira integration and click the **credentials icon** (🔑)
3. Enter your updated email and API token
4. Click **"Update Credentials"**
### Updating Webhook Settings
To modify webhook configuration:
1. Go to **Organization Settings** → **Project Management Integrations**
2. Find your Jira integration and click the **webhook icon**
3. Update your webhook secret
4. Click **"Save Webhook Configuration"**
## Linking Projects to Jira Epics
Once Jira is integrated, you can link individual Codemod projects (campaigns) to Jira epics for tracking.
### From a Project Page
Open any Codemod project/campaign from your dashboard.
In the project header area, you'll see a **"Link to a Jira Epic"** button with the Jira logo.

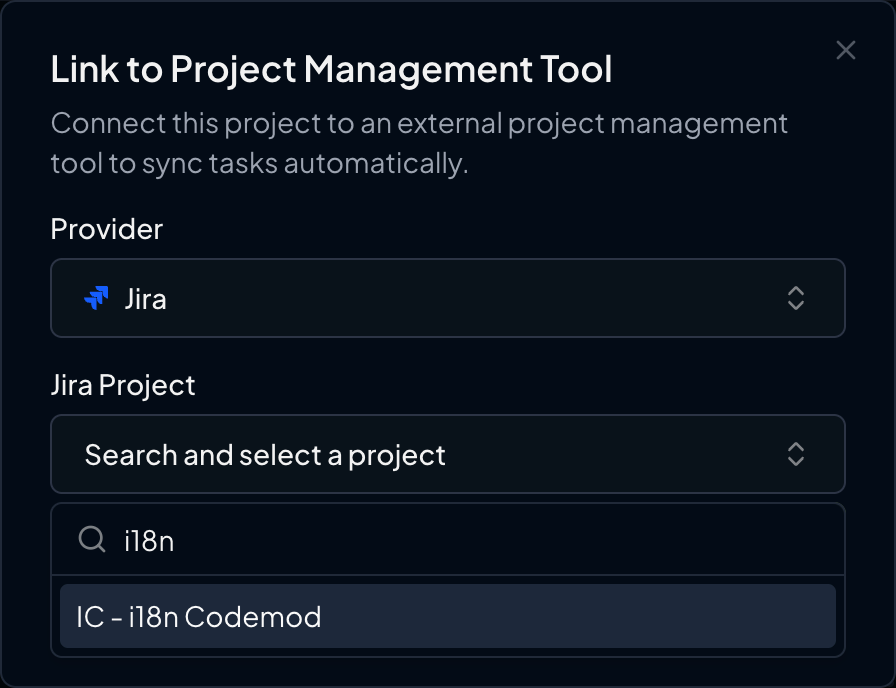
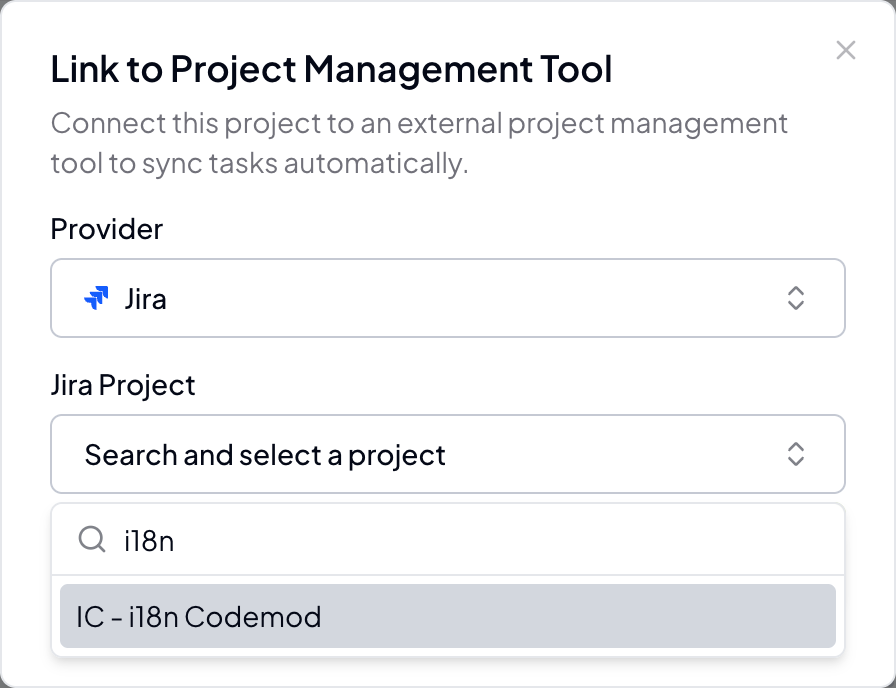
 If you have multiple PM integrations, select your Jira workspace from the provider dropdown.
1. Search for your Jira project or epic by typing in the search field
2. Select the appropriate Jira project from the dropdown
3. The format will show: `PROJECT-KEY - Project Name`
If you have multiple PM integrations, select your Jira workspace from the provider dropdown.
1. Search for your Jira project or epic by typing in the search field
2. Select the appropriate Jira project from the dropdown
3. The format will show: `PROJECT-KEY - Project Name`
 Click **"Link Project"** to establish the connection between your Codemod campaign and the Jira epic.
### Viewing Linked Projects
Once linked, you'll see the connection status in your project:
* **Linked projects** display the Jira project key and name
* **Status sync** shows progress updates from Jira
* **Quick access** provides direct links to the associated Jira epic
## Benefits of Project Linking
Automatically sync task progress between Codemod campaigns and Jira epics for unified reporting.
Keep your entire team informed about code transformation progress through familiar Jira workflows.
Integrate code modernization efforts into your existing project management and sprint planning.
Maintain complete visibility and traceability of all code changes through Jira issue tracking.
## Required Permissions
Your Jira API token needs the following permissions:
**Read** access to:
* Projects and project configurations
* Issues and issue metadata
* User information
**Write** access to:
* Issues (to sync status updates)
* Comments (for progress notifications)
These permissions are typically included with standard Jira user accounts. Admin permissions are not required.
## Troubleshooting
* Verify your Jira base URL is correct (should be `https://your-domain.atlassian.net`)
* Check that your email matches your Jira account email exactly
* Ensure your API token is valid and hasn't expired
* Try generating a new API token from Atlassian
* Confirm you have access to the Jira projects you're trying to link
* Check that the projects exist in the Jira workspace you connected
* Verify your API token has read access to the specific projects
* Try refreshing the project list or searching with different terms
* Verify the webhook URL is correctly configured in Jira
* Check that the webhook is enabled in Jira settings
* Ensure the webhook secret matches between Jira and Codemod (if used)
* Confirm that issue events are selected in the Jira webhook configuration
* Check that webhooks are properly configured and enabled
* Verify network connectivity between Jira and Codemod
* Ensure your API token has write access to update issues
* Try unlinking and relinking the project
## Security Considerations
Keep your Jira API token secure and never share it publicly or commit it to version control.
* **Token Security**: All API tokens are encrypted at rest and in transit using industry-standard encryption
* **Webhook Validation**: Use webhook secrets to validate incoming requests from Jira
* **Minimal Access**: Only grant the minimum required permissions for your integration needs
* **Regular Rotation**: Consider rotating API tokens regularly for enhanced security
* **Access Review**: Regularly review which projects and issues have access in your Jira workspace
To revoke access from Jira's side:
1. Go to [Atlassian API Tokens](https://id.atlassian.com/manage-profile/security/api-tokens)
2. Find the Codemod token and click **"Delete"**
***
Click **"Link Project"** to establish the connection between your Codemod campaign and the Jira epic.
### Viewing Linked Projects
Once linked, you'll see the connection status in your project:
* **Linked projects** display the Jira project key and name
* **Status sync** shows progress updates from Jira
* **Quick access** provides direct links to the associated Jira epic
## Benefits of Project Linking
Automatically sync task progress between Codemod campaigns and Jira epics for unified reporting.
Keep your entire team informed about code transformation progress through familiar Jira workflows.
Integrate code modernization efforts into your existing project management and sprint planning.
Maintain complete visibility and traceability of all code changes through Jira issue tracking.
## Required Permissions
Your Jira API token needs the following permissions:
**Read** access to:
* Projects and project configurations
* Issues and issue metadata
* User information
**Write** access to:
* Issues (to sync status updates)
* Comments (for progress notifications)
These permissions are typically included with standard Jira user accounts. Admin permissions are not required.
## Troubleshooting
* Verify your Jira base URL is correct (should be `https://your-domain.atlassian.net`)
* Check that your email matches your Jira account email exactly
* Ensure your API token is valid and hasn't expired
* Try generating a new API token from Atlassian
* Confirm you have access to the Jira projects you're trying to link
* Check that the projects exist in the Jira workspace you connected
* Verify your API token has read access to the specific projects
* Try refreshing the project list or searching with different terms
* Verify the webhook URL is correctly configured in Jira
* Check that the webhook is enabled in Jira settings
* Ensure the webhook secret matches between Jira and Codemod (if used)
* Confirm that issue events are selected in the Jira webhook configuration
* Check that webhooks are properly configured and enabled
* Verify network connectivity between Jira and Codemod
* Ensure your API token has write access to update issues
* Try unlinking and relinking the project
## Security Considerations
Keep your Jira API token secure and never share it publicly or commit it to version control.
* **Token Security**: All API tokens are encrypted at rest and in transit using industry-standard encryption
* **Webhook Validation**: Use webhook secrets to validate incoming requests from Jira
* **Minimal Access**: Only grant the minimum required permissions for your integration needs
* **Regular Rotation**: Consider rotating API tokens regularly for enhanced security
* **Access Review**: Regularly review which projects and issues have access in your Jira workspace
To revoke access from Jira's side:
1. Go to [Atlassian API Tokens](https://id.atlassian.com/manage-profile/security/api-tokens)
2. Find the Codemod token and click **"Delete"**
***